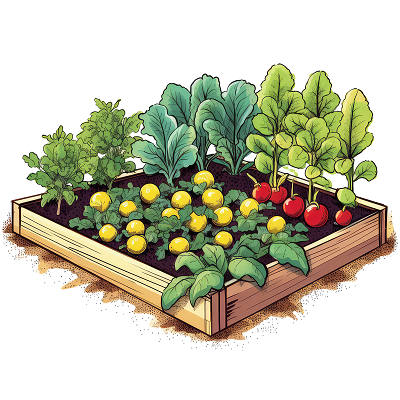
 There are many benefits to using raised vegetable garden beds in your garden. For starters, one of the best things about raised beds are that you can interplant many types of herbs, vegetables, and flowers into them. It is then easy access to prune and nurture then so to have the healthiest and most productive plants to harvest their “fruits”, so to speak.
Another perk of planting your garden in elevated garden beds is that it is easier on your back and knees because they require less bending, kneeling and crawling than regular beds.
In addition, raised garden beds offer better drainage, which means your plants aren’t stuck sitting in excess water every time it rains. Plus, it is much easier to build your soil UP than it is to work amendments into the ground.
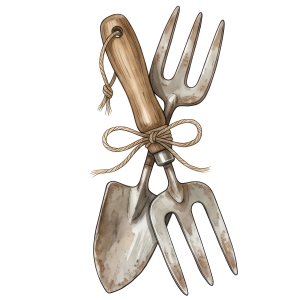
Fortunately, building raised vegetable beds is a super easy do-it-yourself project. All you need are some readily available tools and materials, and an extra pair of hands.
How to Build Raised Vegetable Garden Beds
Tools and Materials
(makes two 8’ x 4’ x 6” high beds)
(6) 1” x 6” x 8’ cedar boards* – 2 boards cut into 4’ sections
Wood screws and/or 8 metal corner brackets
Power drill
Important Note: Cedar is naturally insect and moisture resistant, so it tends to hold up well in outdoor environments. Avoid using pressure treated lumber for your food growing areas because the chemicals used to create them can leach into your soil.
*Cedar boards come in a variety of lengths and widths. Obviously, using 6” wide boards will give you more shallow beds than 10” boards. Choose whichever length and width combination you prefer. If you find 4’ beds are too wide, simply reduce the length of each shorter section to 3’ – 3.5’.
Instructions:
To assemble your raised vegetable garden beds, line the ends of an 8’ foot section and a 4’ sections up so they form an “L” shape. While your helper holds the boards in place, secure the two boards together with wood screws or with the metal corner brackets.
Repeat this process with the remaining cedar boards until you create 2 wooden rectangles, each measuring 8’ in length by 4’ in width.
Once your beds are assembled, carry them a sunny spot in your garden and place them where you want your raised beds before you begin filling them.
Filling Your Vegetable Garden Beds
Of course, you can fill each bed with pre-packaged gardening mix, but you may find that gets a bit pricey. You can also create your own more cost-effective planting medium very easily.
Start by adding a thick layer of newspaper or flattened cardboard across the bottom of your raised garden box. This will help prevent weeds and grass from growing up into your planter. Then, add alternating layers of peat moss, compost, aged manure or barn litter, and topsoil.
You can add additional amendments, such as bone meal or a slow-release organic fertilizer, once you decide which plants you want to grow in each bed and you’ve conducted soil tests to determine what nutrients your soil needs to accommodate those plants.
If you prepare and fill your raised beds in the fall, simply cover them with dark plastic to “cook down” all winter. You will be rewarded with beautiful rich soil in the spring, but it will be quite a bit lower than you remember – so be extra generous when filling the beds.
If you assemble your raised vegetable garden beds in the spring, you can plant right into the layered mixture. Over time, the layers will break down to form a rich soil. In the near term, your plants will do just fine in it as long as you don’t use fresh compost, manure or barn litter, all of which can “burn” your plants.
As you can see, learning how to build raised vegetable garden beds isn’t difficult. If you follow these easy instructions, you can look forward to years of more rewarding and efficient gardening.